What better day to work on your project car or daily driver than the Workers day public holiday we are now celebrating. As electrification edges closer to a daily reality than a theme of the near future, tinkering and servicing our own cars will slowly become a thing of the past. Here are some basic steps to changing your car’s engine oil.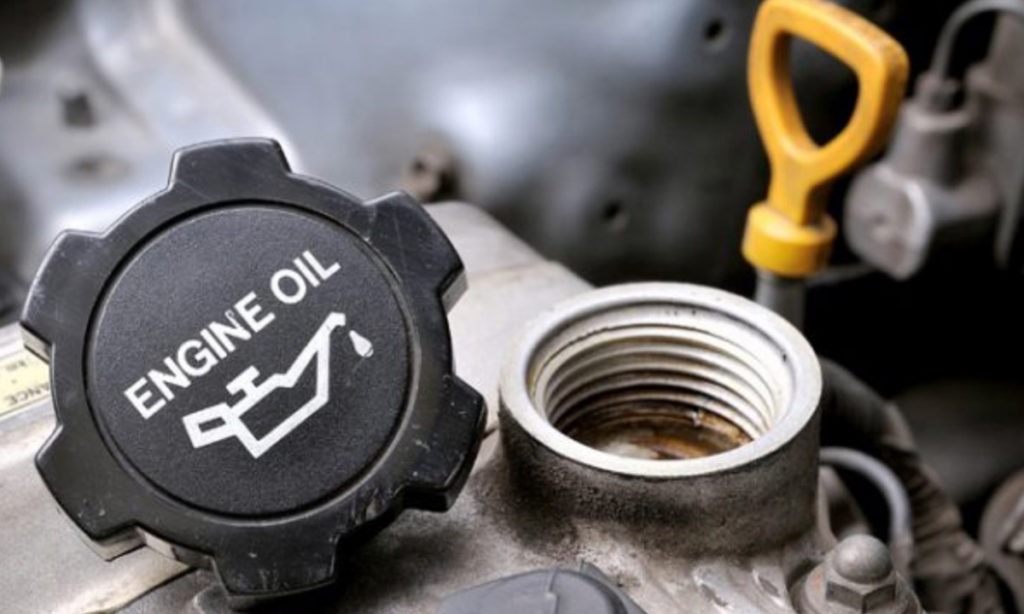
Before we continue, research is of paramount importance in ensuring you follow the correct process and use the correct products. Each model is different, requiring unique consumables and engine oil, because of this, we strongly recommend consulting your service manual, forum or online database for your car model and engine type to ensure the correct grade of oil is used and the right steps are followed. If you are unsure, speak to a competent mechanic.
Engine oil is crucial in ensuring all of the moving parts hidden beneath the surface remain sufficiently lubricated under driving conditions. Internal Combustion Engines run on tight tolerances and oil sludge or a lack of oil in general can create irreparable defects that will hinder optimal operation or seize the engine completely. The newer the oil, the better the engine will run so it is always advisable to change it within the designated service intervals which are dependent on the vehicle. If you drive your car hard frequently, including competing in track days or drag racing, it is strongly advisable that the oil is changed more frequently than normal.
Once you have researched what consumables and grade of motor oil you will need, the next step will be to source the parts from an auto shop or hardware store. While you are there, make sure you don’t need any specialised tools to complete the job like spanners or alan keys.
The next step will be to find a flat, stable surface to conduct the oil change, preferably out of the way of any other parked cars. A flat surface will get as much of the old engine oil out as possible, inclines or angled surfaces mean that not all of the oil may be able to drain out of the engine block.
Now begins the work; lower cars will firstly need to be jacked up on the front-end (if your car has a front mounted engine), you may be able to skip this step if you own a bakkie. Ensure with great caution that the jack stands are safely beneath the car in their corresponding jacking points and then only release the car down onto them. For the sake of sanity, one can give the bodywork a gentle nudge to prove that it has safely been placed on the jack stands. 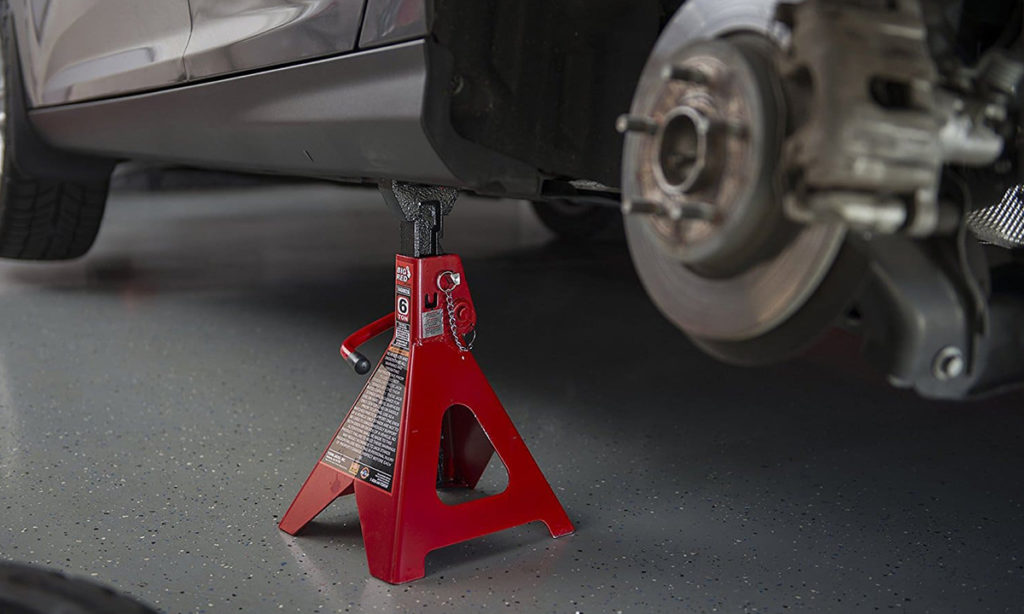
Now that the car is raised and there is some working room beneath, it would be advisable to place plastic or cardboard beneath the engine bay to make sure any spillage won’t make too much of a mess.
Get beneath the engine and locate the oil-drain plug which is normally positioned at the bottom of the engine block or on the sump. Modern cars may have a plastic undertray that will need to be removed first. Determine what tool you will need to loosen it but before continuing. Prior research should have yielded how much oil the crankcase, and block, holds so ensure you have a receptacle big enough to retrieve the contents placed beneath. 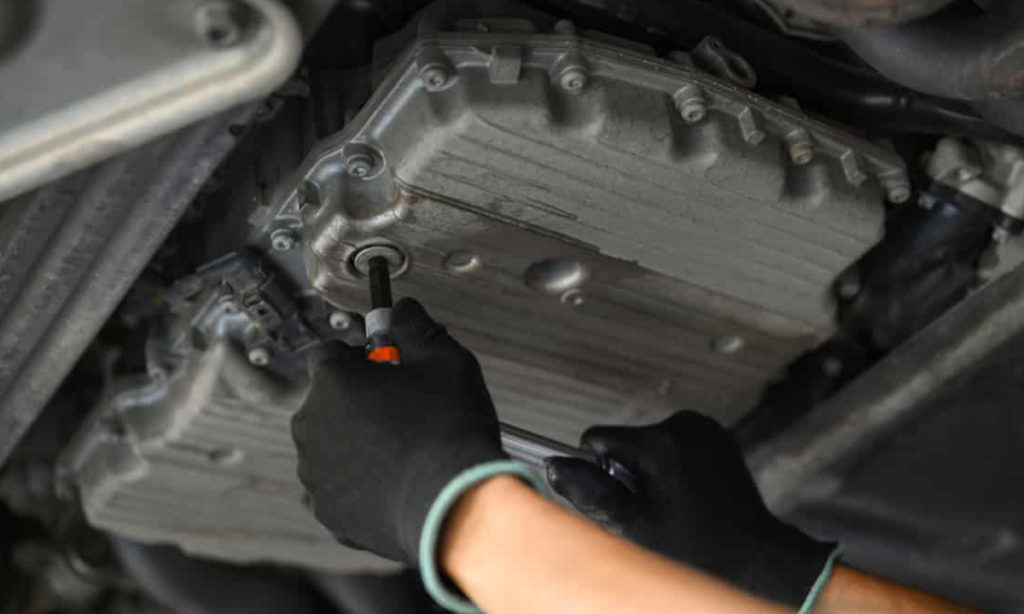
Remove the bolt and let the oil flow into the receptacle. Top Tip: hold on to the drain plug as you remove it to prevent oil pouring out uncontrollably from the oil pan. This very seldom goes to plan so have some paper towel and Cleen Green on standby to make sure any spillage can be easily cleaned to prevent an angry wife or landlord. For bigger spills, use sand to absorb the petroleum based liquid.
While the oil is draining, locate the oil filter and slowly loosen that. You might need an oil-filter wrench to properly get it out though. Once again, this will be in different locations depending on the car, model and engine type. Let the flow of oil subside once it has been loosened before removing it completely. In this process, ensure that the o-ring from the old filter is not left behind on the engine block as this will prevent proper sealing with the new filter. After removal, the oil filter can be placed in the receptacle with all of the old motor oil. 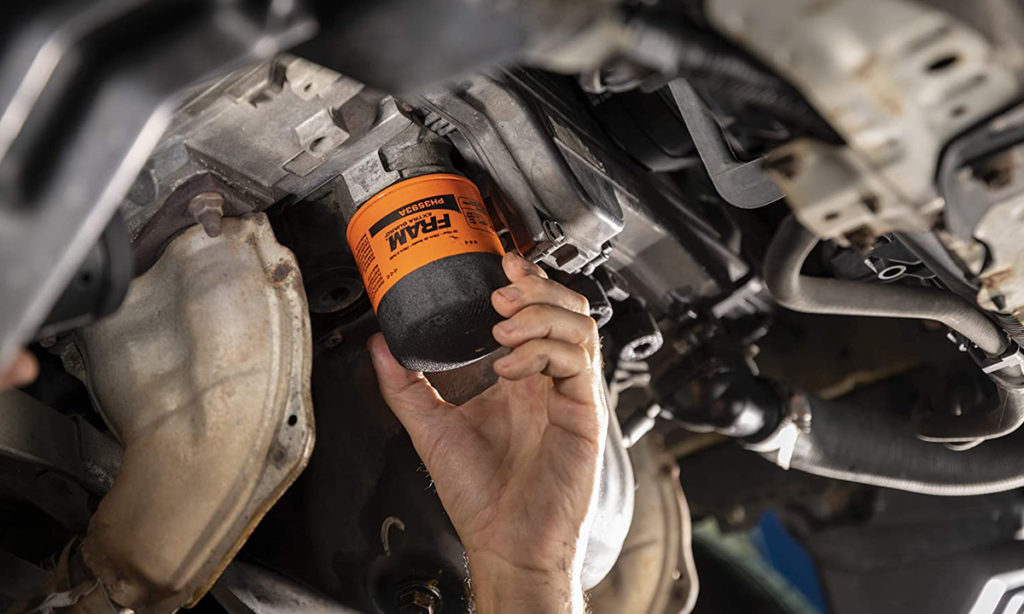
Disposing of the old motor oil and filters needs to be done responsibly considering the detrimental effect waste oil has on the environment. Did you know: a quart of used motor oil can pollute up to 1 million gallons (or more than 4 million litres) of water. Make sure you know where to dispose of the old engine oil, the ROSE Foundation offers this service.
Thereafter all of the oil has been drained, the new oil filter can be attached and the drain plug can be tightened to factory settings with a torque wrench. Refer to the owner’s manual or your internet source to see if any other components need to be installed in this process. When installing the new oil filter, run a light coating of oil along the o-ring with your finger which will help seal the newly installed consumable. Turning it until it is just more than hand tight should do the trick.
Move to the top of the motor and remove the oil cap. The new, golden motor oil can now be filled in from there. Top tip; if you don’t have a funnel, place the dipstick into the cavity of the oil cap to direct the flow of the viscous liquid from the bottle neatly into the engine block. Once you have replaced the oil with the required amount, replace the oil cap.
Look beneath the engine to see if there are any leaks, once sufficiently happy, the car can be removed from its jack stands and lowered to the ground. Check that the dipstick is registering oil after the oil has settled after a few minutes. Let the motor run for a few minutes until it is at optimal operating temperature to ensure correct circulation, continuously looking out for leaks beneath the motor. Check that oil is registering on the designated signifiers on the dipstick.
If you are satisfied, the job has been done and you have engaged in the dying art of an Internal Combustion Engine oil change while saving a few Rands along the way!